Spiral first coat of plaster

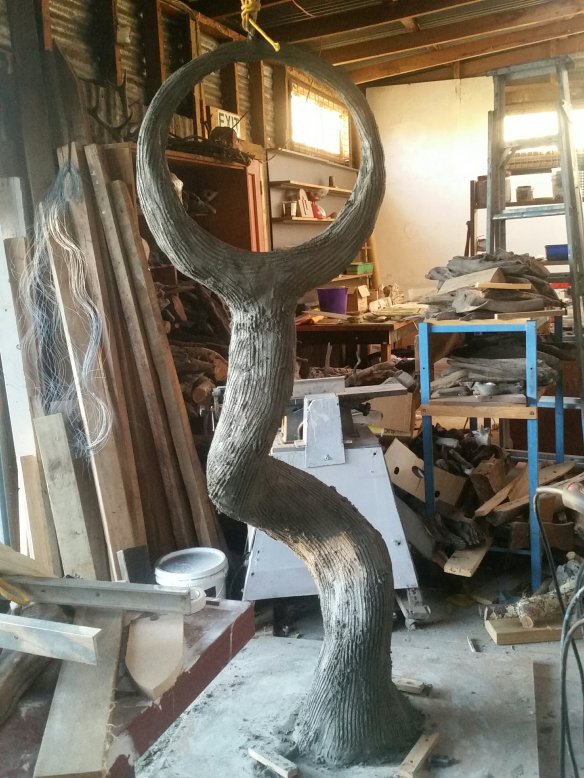
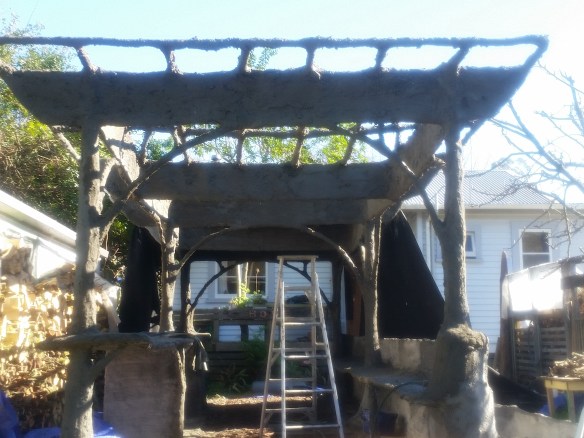
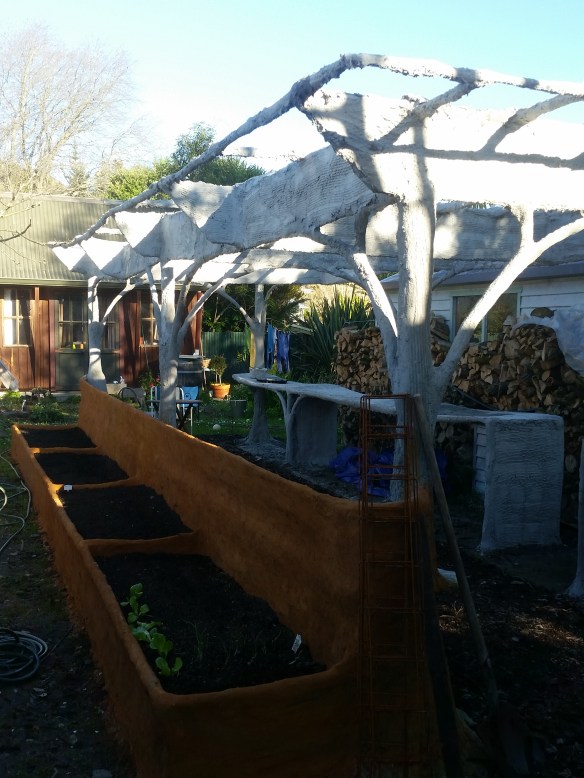
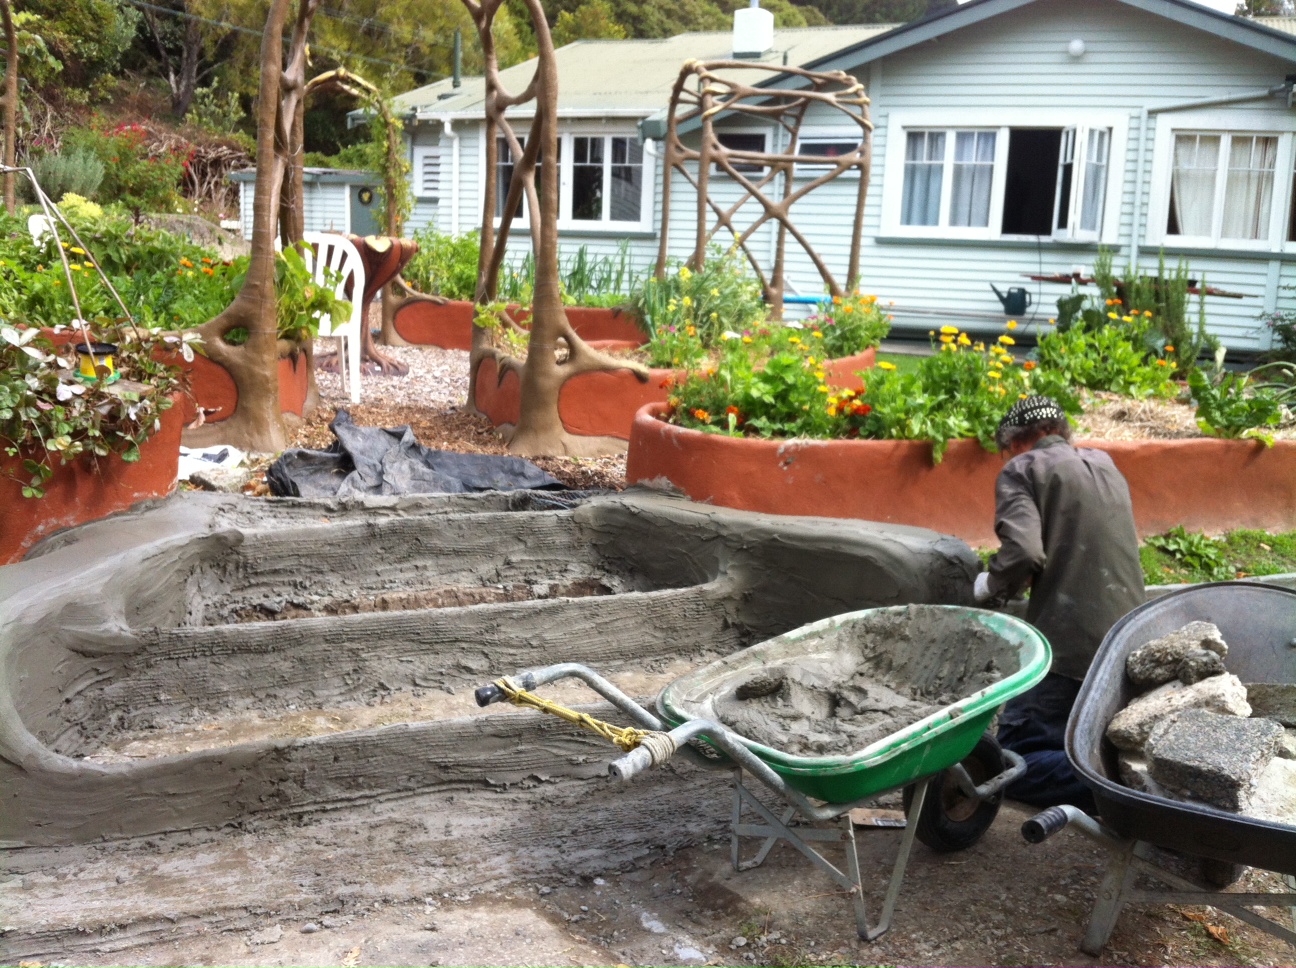
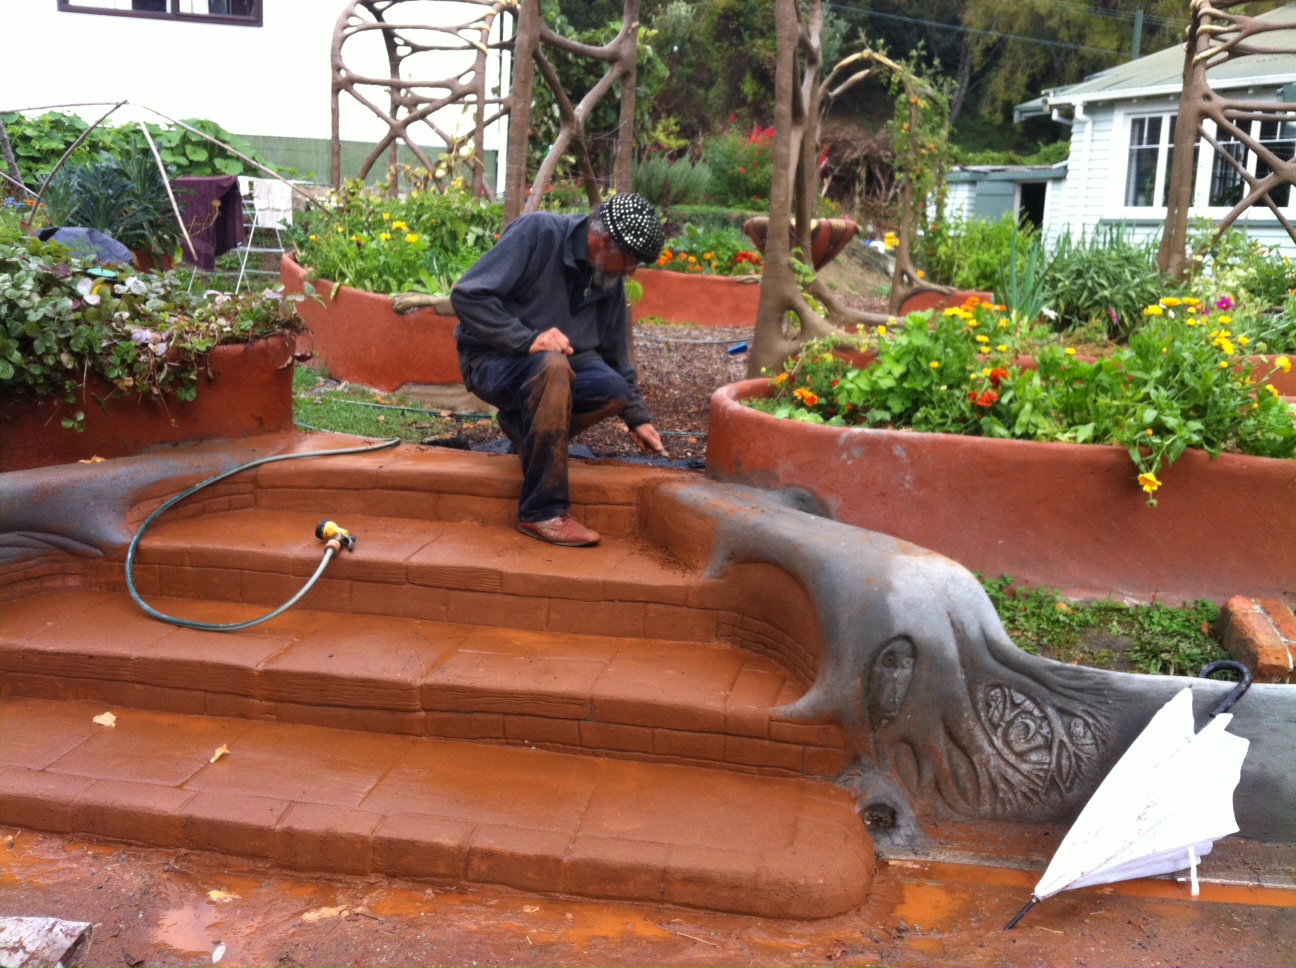
Always a mental obstacle to starting the next stage… transition to a different mode feels like a big job. But plastering is actually quite quick… the thing is to begin!

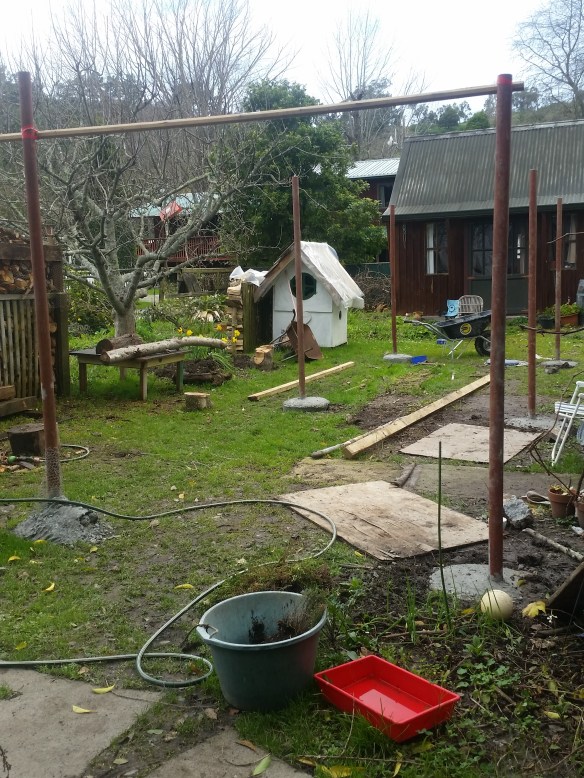
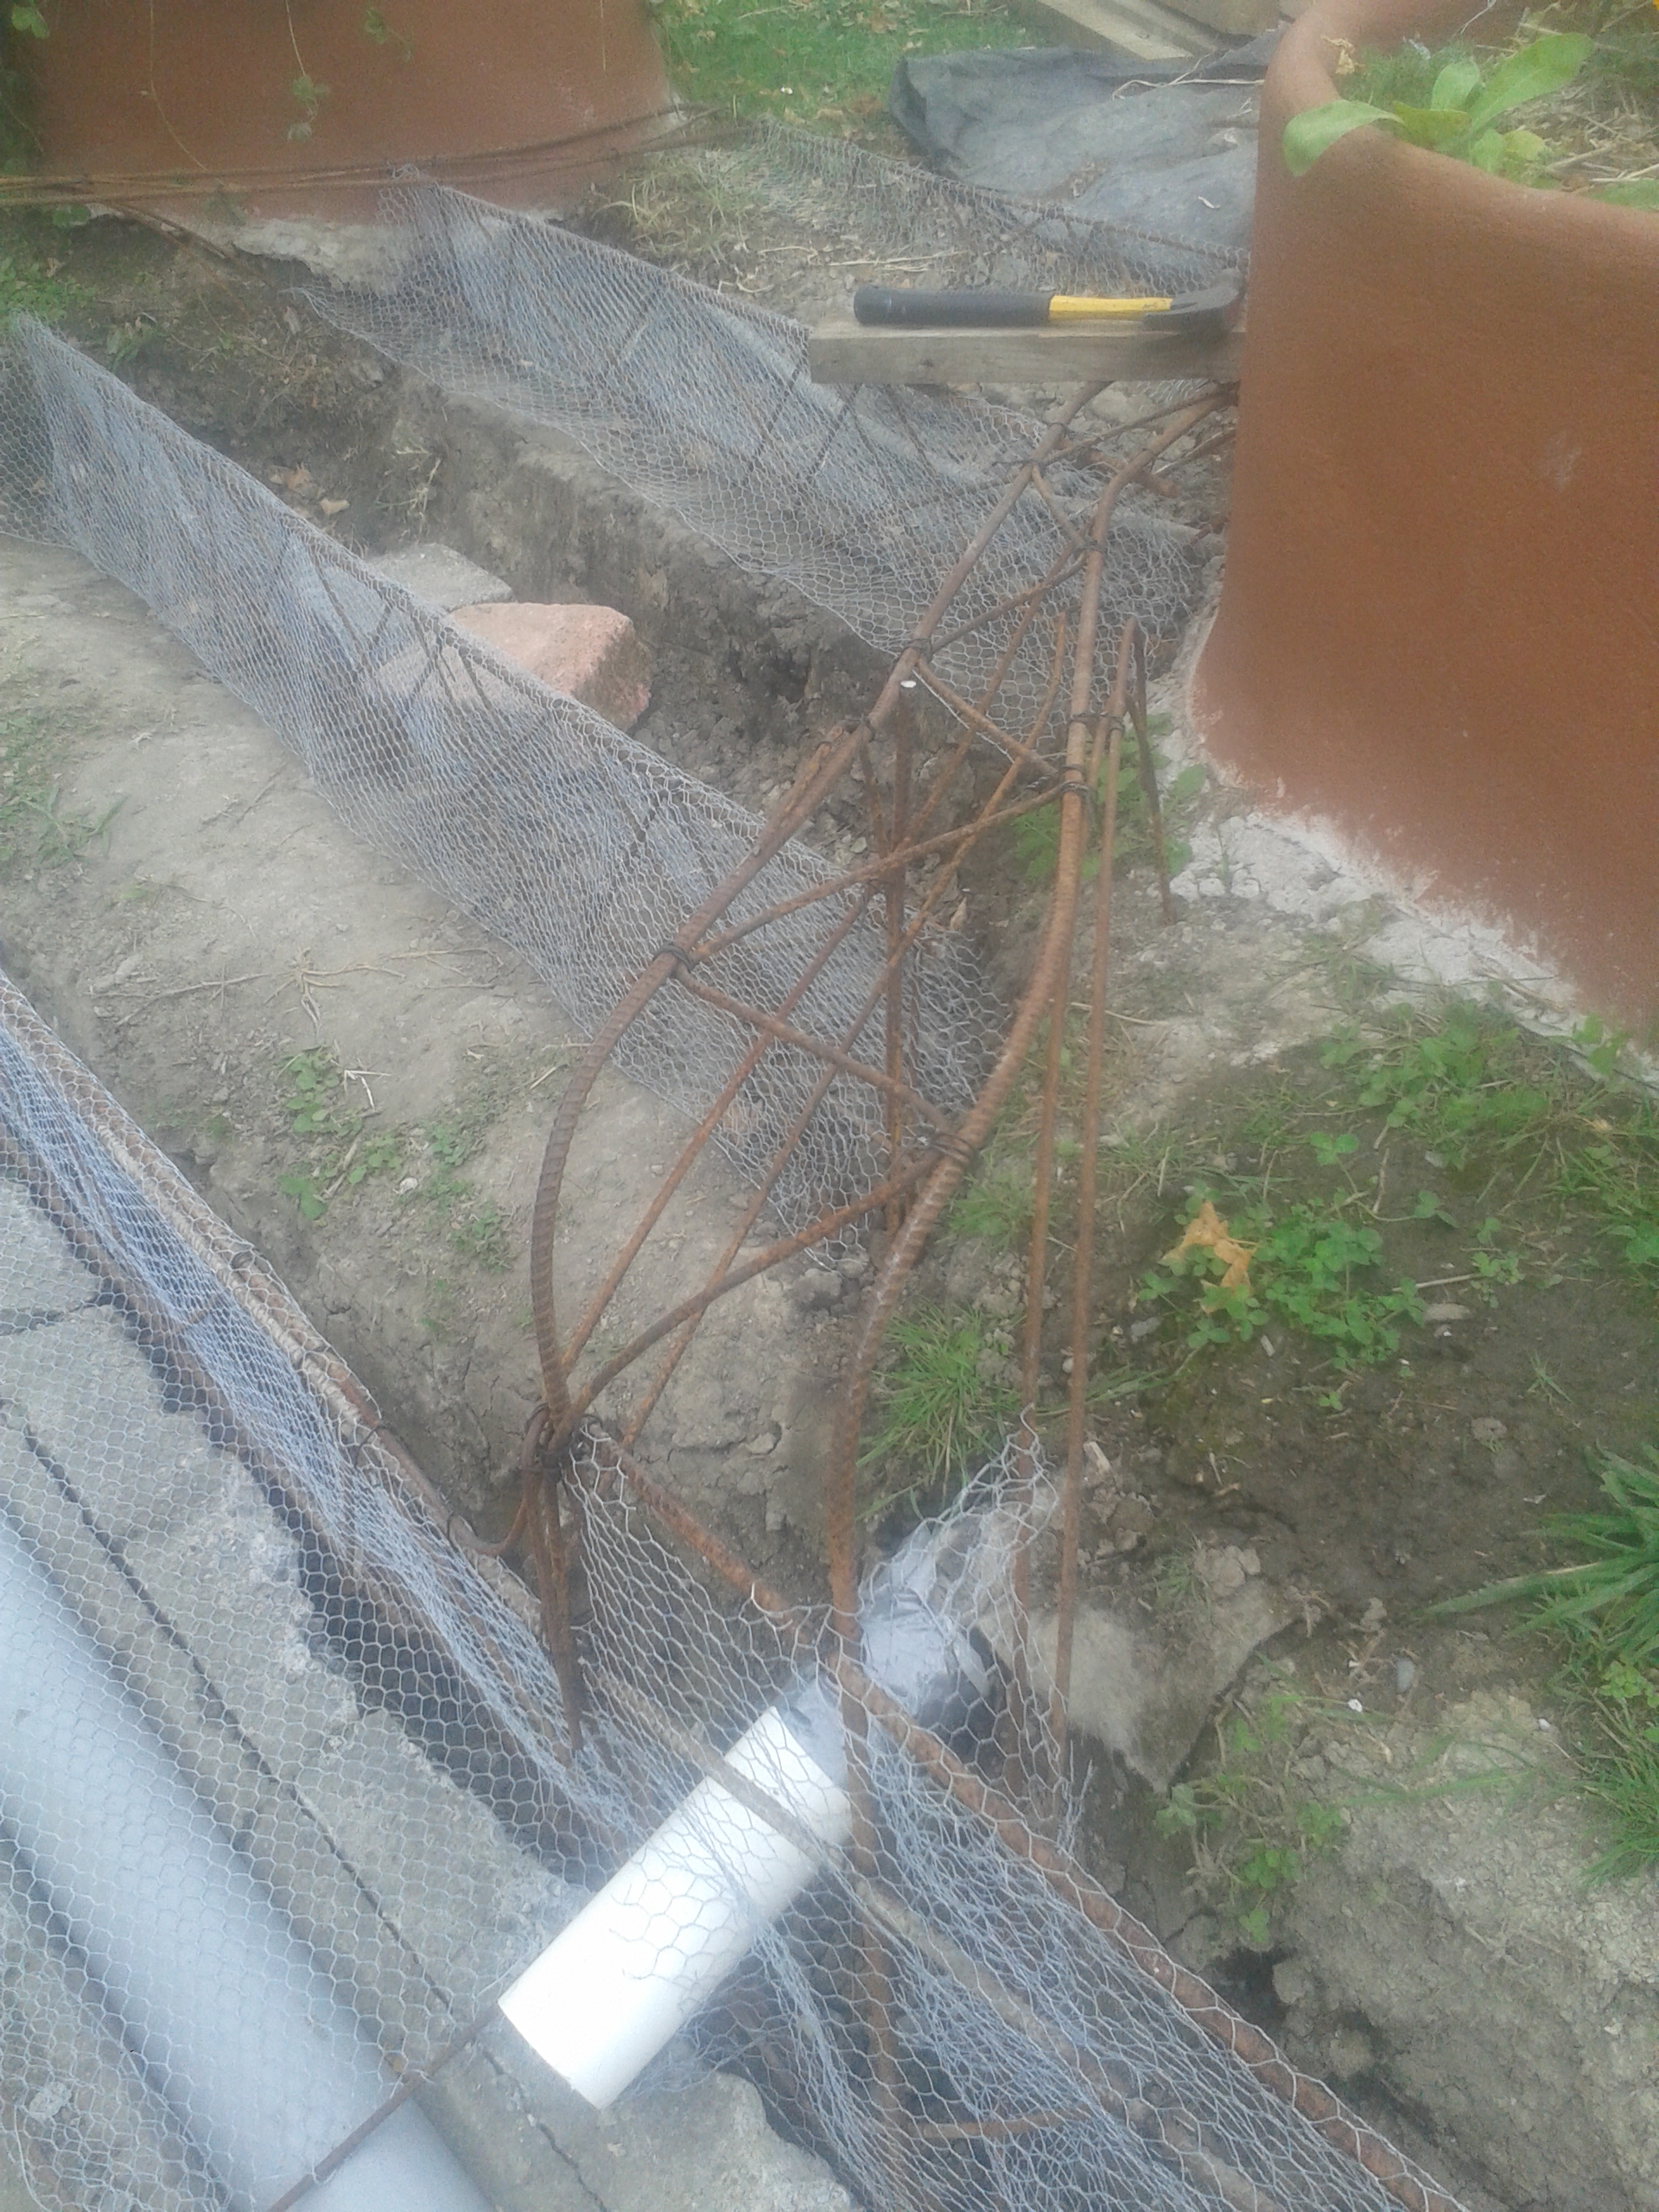
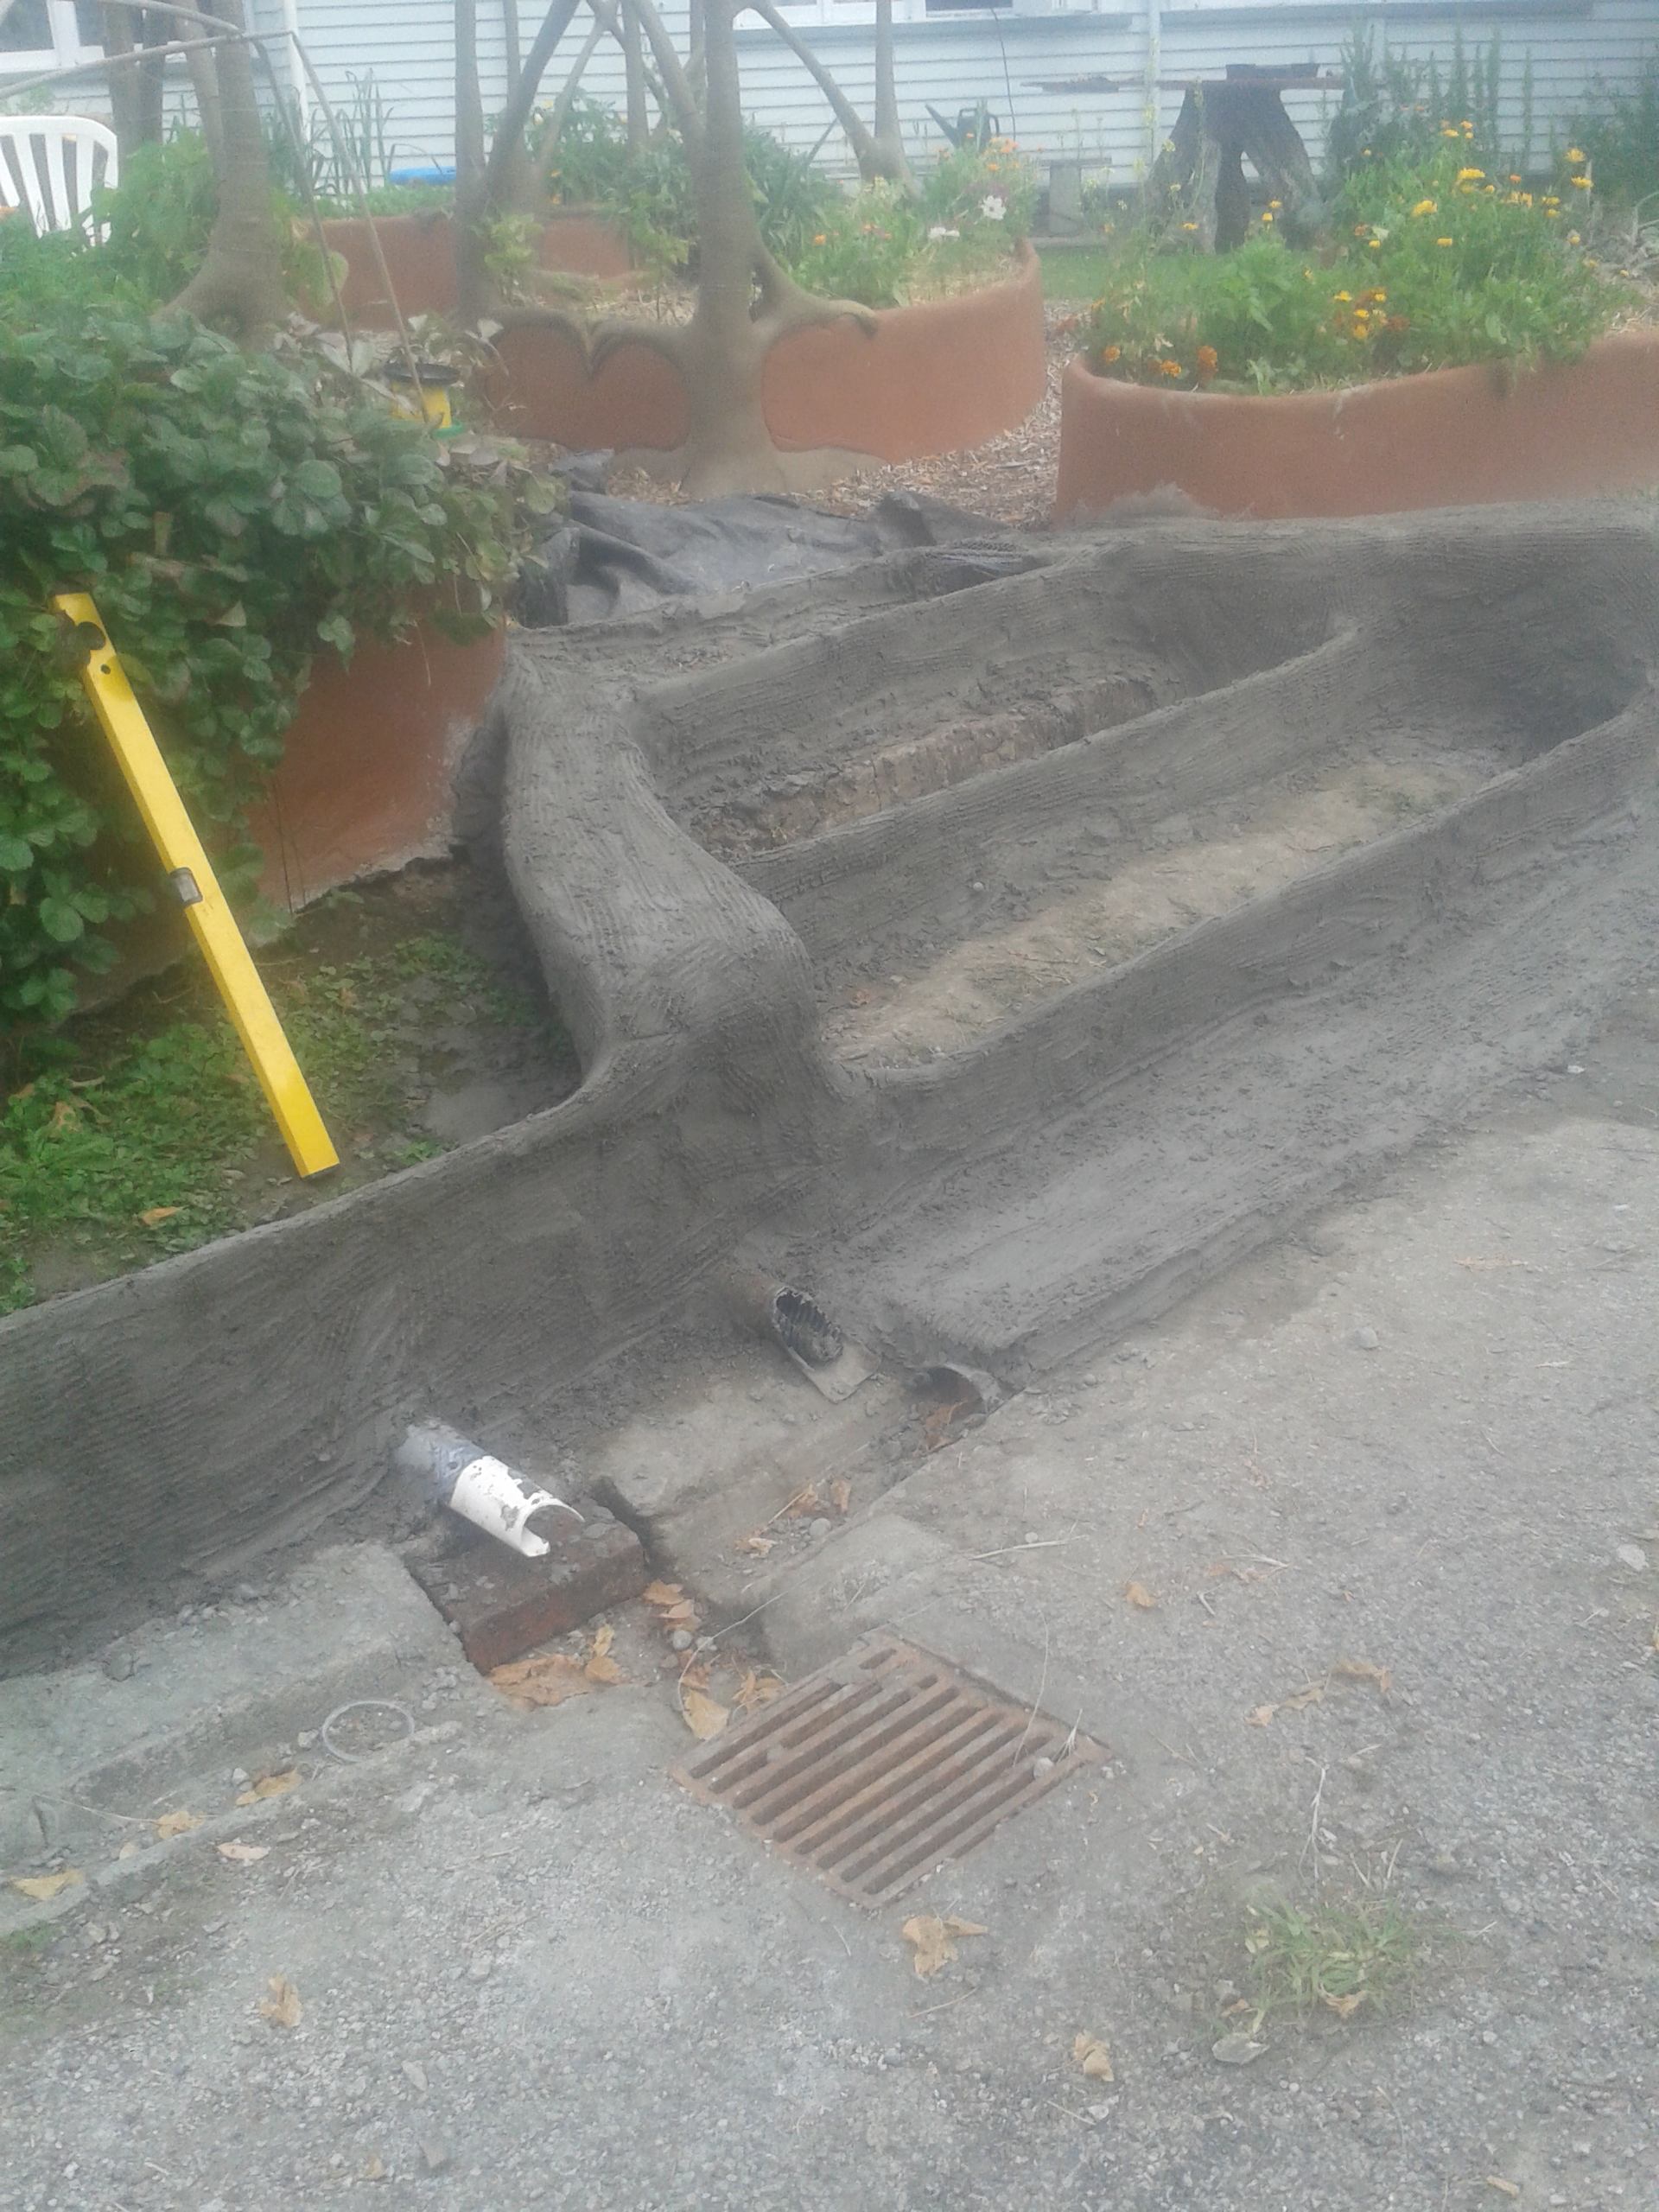
Note the ropes steadying and supporting the sculpture while it sets. Also the screwed wood pieces holding the twisted 10 mm rebar main armature pieces bent at right angles at the floor.

Advertisement

New tools and techniques

I’ve been working on a new ideal rebar bender for the 6mm rebar…will work for the 10 mm or 12mm too I’m sure. Requires welding but worth it I think. The bending grooves I cut using standard angle grinder. One model I made by welding a square of hard steel onto the flattened end of a piece of old electrical conduit pipe, the other is the cut off end of an old wrench. Handles formed by winding soft polypropylene cord around the pipe with plenty of pva glue. Frayed ends soaked in glue can be tucked under the windings.

Also see this cool way to crosscut chicken mesh to make nice stretchy strips for winding around curved railings or spirals such as this sculpture I’m building to house a spinning bronze ‘sun-wheel’ for a customer. I use strips a lot now. It’s quick to cut them if you just fold a length of chicken mesh lengthwise twice so it’s a quarter as wide, then tinsnip this long strip crosswise…strips about 150mm to 25mm wide. They stack well until use when you just grab the ends and pull. Strips cut like this are very stretchable. There are cut ends of mesh of course, but I’ve found if I wear leather rigger’s gloves (soft pigskin – quite cheap) they don’t hurt… also on the first plaster coat I now wear either rigger’s gloves or thick nitrile gloves safety equipment shops have these..or the local bigger hardware shop (Bunnings here in nz). The sharp ends of the mesh are buried in plaster at the first coat with a little care, or at least by the second coat. For longer rails or tubes of ferro – e.g. branches or garden arches – it is the only way to go I think. And being wound on in overlapping windings it doesn’t need much – or any – lacing wire to hold it in place, just at the final end of the winding. See one of the folded cut strips in the first picture. Note the tins nips screwed down for quick snipping.

Harvest and Hugelkultur

Late summer and lots of tomatoes in the raised beds and some grapes on the pergola, and beans and pumpkins… And the arch and extra high raised bed idea seems to be working well – it doubles as a boundary divider and ‘hugelkultur’ raised bed. In hugelkultur you mound up soil over old logs and branches. I thought, why not make extra high beds and mostly fill them with old wood (untreated of course)… The plants seem to be thriving…

Raised beds with anti-snail lips

20171018_103734

Raewyn’s Appletree cottage food gardens now have two raised beds with a new turned-down lip which I’m hoping will turn back snails – or trick the into hibernating when they reach the dry overhang. Then Raewyn can catch them there before they get into her gardens…slugs too with any luck!

The lips are made by bending over the square mesh ends then tying 6mm rod to the ends. A single length of chickenwire folded lengthwise over the framework and tucked into the underside of the turned over part was just wide enough. Plastering was a bit longer but first coat took 2 hours per bed, second coat about the same counting sponge finishing and cleanup. See photos…

Dandelion cappuccino break during filling with 1.7 cubic metres of compost each bed (3.8 metres long by 1.25, 36cm deep). The thrushes and blackbirds loved the worms from the homemade compost Raewyn added to the bought stuff…


A ferrocement pergola with raised beds, benches and firewood storage

20171008_190100

A Home project… part of Appletree Haven’s intensive garden makeover. Finally it’s done! Many sidetracks and weather delays, and a few health delays too! This pergola is quite big – 8 metres by about 3.2 all up.

I continue to refine techniques, especially the making of ferro round section beams… also made a new bender, and got a bigger (125mm) angle grinder with ultrathin cutoff disks for quick cutting of rebar especially all the square mesh I’m using now for all but the fully rounded shapes. I used a spray pack with handpump for applying the iron sulphate solution for the rusty finish stain… way faster than brushing on! Here are some more photos of the final product, followed by some of the building thereof.20171007_123229

20170806_10453320170809_18051320170810_11372720170811_12142320170811_18505320170812_12073320170813_13094820170814_17414220170817_09593820170817_09594220170817_09594720170817_09595220170817_09595720170817_10000020170817_10000920170817_10001420170817_10001820170817_10003720170825_10151220170829_15523220170825_10151220170817_10003720170817_10001820170817_10001420170817_10000920170817_10000020170817_09595720170817_09595220170817_09594720170817_09594220170817_09593820170814_17414220170813_13094820170812_12073320170811_18505320170811_12142320170810_11372720170809_18051320170806_10453320170829_15523220171004_16315620170722_01481020170720_14000420170721_11435320170720_11554720171004_185551


Spiral herb garden progress

Well I’m finally back to ferrocement, in Gisborne now based at Dreamspace gallery and workshops, 61 Carnarvon St. Main focus in the ferro: ‘dreamhavens – cabins you only dreamed of’… see www.dreamhaven.nz  . (formerly hobbithaven – this was lost in cyberspace when my old email peter at eutopia disappeared with eutopia.co.nz – sigh!)

dreamhaven card 26 06 17

The Tairawhiti Environment Centre here asked me to make a herb spiral for them, and a garden path edging. Here are some photos. The spiral was a challenge as it is a complex shape to bend steel to – a spiral of steel rebar becomes a giant spring which needs strong framework to hold it. I put it over a ‘christmas tree’ frame specially made for forming circles and sprirals. But next time I will try welded joins – tied ones slip and the spiral twists… So, welding learning curve next… Also note the colour – hybrid of some ‘marigold’ oxide in the final coat and a wash of iron sulphate (used in lawn care for moss control) within a day of last coat and carving of it. Also note the black non-woven weedmatting for protection while the plaster cures – we got a 4 metre-wide roll of the thick felty stuff from Permathene which works well as it is wettable, doesn’t flap about, and won’t tear or fray like woven does. Raewyn will help fill the spiral and plant it. We are donating it to the cause – good advert I hope!

The garden edging took a lot of bending over and joining up 6 metre lengths, but it is very strong. They plan to fill it with smooth pebbles.

20170627_160643


Stairway to Haven photos of the steps – construction and carving

This shows the stages I hope fairly well tho jumbled order, and sorry my phone camera had bleary eyes! Grandson Bruno helped, got plastered, and toppled (gently) off the rebar once… He was laughing about it two minutes later. Note the mix consistency in wheelbarrow – firm but fluffy – ie been mixed for a few minutes briskly to aerate a bit. Went on like butter. Carving the next day just in time – the 2:1 mix was already getting hard!

The coloured plaster was so the steps wouldn’t need painting. (1kg of powder iron-based – colour called ‘marigold’, per 20kg of cement. Used 1.5 kg all up.) I went over the whole with iron sulphate stain as well, though later Anna plans to paint all but the actual steps to match the raised beds and arches. There’s a little ‘grotto’ space under the arms of the steps, with two plaster lizards formed from left-over coloured plaster…

The steps took way longer because there was an existing slope and I couldn’t just ‘carve’ the steps out of the earth then lay the chickenwire onto it. Steps had to be built up and filled with waste concrete pieces and concrete. Much leveling and measuring, as Bruno shows!

064 058 057 053 part of annas new steps image image (10) image (9) image (6) image (3) image (2) image (1) 113 100 091 085 083 080 079 078   067

Stairway to Haven

I’ve just been in Gisborne adding a grand stairway to daughter Anna’s ferrocement raised bed garden… carved with a few scenes from Tolkien and three owls (Anna wanted that because three moreporks visited the garden the night they put up the owl-carved finial on the house overlooking the garden).

Photos to come – meanwhile here’s the handrail of the steps to the housetruck at our haven on the Kaipara. They were added recently, took a couple of days all up. Painted gold with green rubbing to make like bronze.  Also see the steps cut into the turf bank by my new cabin…

This slideshow requires JavaScript.

Hobbits happy

And so will I be! I’m embarking on a new venture, which has its own blog/website: https://hobbithaven.wordpress.com/ – a new enterprise all about making a new line of hobbitholes, cabins, tiny homes, etc., all in the Tolkien spirit and incorporating Elven and other influences as well but focusing on (licensed) hobbit structures (human sized of course). Click the link and follow the journey!  I will still post here the more technical stuff as before..

The cabin in the woods the making of which inspired me to go hobbit building:

063